Choosing an implant is not a catalog exercise. It is a clinical decision shaped by anatomy, diagnosis, surgical access, patient activity, and long-term follow-up. This article explores How to choose orthopedic implants for different medical departments, from trauma and spine units to sports medicine and joint reconstruction services.
A trauma department may prioritize immediate stability, simple instrumentation, and reliable fixation around damaged bone. A spine team may examine alignment, load distribution, imaging compatibility, and neurological risk. Arthroplasty specialists often compare bearing surfaces, implant geometry, fixation methods, and revision options. Sports medicine teams may focus on tissue preservation and a safe return to movement. Small details matter. A locking screw’s angle can affect fracture control. A cup’s position can influence hip stability.
William J. Mayo’s guiding principle remains highly relevant: “The best interest of the patient is the only interest to be considered.” His words remind purchasing teams and surgeons to look beyond brand reputation. Clinical evidence, manufacturing quality, training support, traceability, and documented outcomes deserve equal attention. Regulatory clearance matters too.
There is no universally perfect implant.
Even experienced teams can disagree. That uncertainty deserves careful review, not rushed selection. A younger patient may need a different design from an older patient with fragile bone. A rural hospital may also require simpler instruments and dependable technical support. These realities complicate comparisons, but they make department-specific planning more honest. The following seven tips provide a practical framework for evaluating implants with clinical judgment, transparent evidence, and respect for each patient’s individual needs.
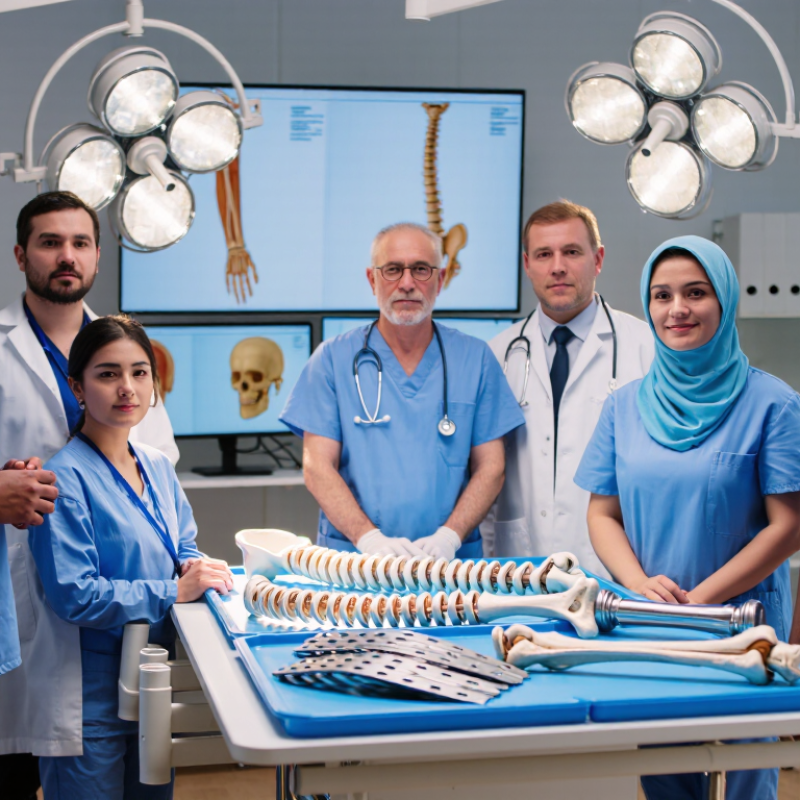
Orthopedic implants should match the department’s daily work, not just a product catalogue. Trauma units often need versatile fixation systems for fractures, urgent availability, and instruments that remain clear under pressure. Joint replacement departments may prioritize accurate sizing, trial components, compatible imaging, and predictable operating steps. Spine teams usually require careful attention to anatomy, radiographic visibility, and implant stability.
Review seven practical points before selection: patient anatomy, surgical indication, material properties, instrument design, sterilization workflow, staff training, and supply continuity. A department should test whether the instruments fit its tables, trays, and storage system. It should also confirm that implant sizes cover smaller and larger anatomies. Gaps in sizing can create unnecessary intraoperative compromises.
Clinical evidence deserves close reading. Compare published outcomes, complication reporting, mechanical testing, and applicable regulatory documentation. Ask surgeons, nurses, and sterile-processing staff to evaluate the same system. Their concerns differ, and all are useful. Ask why. A radiology review can reveal poor visibility or confusing markings before clinical use. Training should include realistic handling, not only a presentation.
Cost matters, but the lowest purchase price may hide extra trays, training time, or replacement needs. Consider total ownership over several years. No checklist is perfect. Departments should record unexpected difficulties after surgery and revise their criteria. That small habit can expose weaknesses that procurement meetings miss. Reliability grows through repeated review, transparent records, and cautious clinical judgment.
Choosing an orthopedic implant should begin with the procedure, not the catalog. In trauma surgery, titanium alloys can offer strength, lighter weight, and useful imaging behavior. Plate thickness, screw direction, and locking stability must match the fracture pattern. For joint reconstruction, cobalt-chromium may suit high-wear surfaces, while ceramic options can reduce friction in selected patients. Bone quality matters greatly.
Spine procedures require different thinking. Interbody devices may use PEEK when radiographic assessment is important, but their surface design must support bone growth. Porous metal can help fixation in weak bone, although it may complicate revision. In sports medicine, small anchors and interference screws should match tendon load, tunnel size, and absorption requirements. The smallest implant is not always the safest choice.
Ask seven practical questions across departments: What load will it carry? How will it be positioned? Can imaging show healing clearly? Is revision realistic? Does the design fit local instruments and sterilization processes? Is there reliable clinical evidence? Can the team trace every component? Surgeons, radiologists, nurses, and procurement staff may notice different risks. A simple checklist can still miss patient-specific anatomy. I have seen elegant designs perform poorly when access, training, or bone condition was overlooked. Review instructions for use, independent studies, and documented outcomes before selection. Patient goals and informed discussion should remain part of the decision.
Matching implant materials and designs to surgical procedures requires balancing mechanical strength, stiffness, wear resistance, biological response, imaging needs, and revision strategy.
Approximate elastic modulus values are representative reference values. Actual performance varies with alloy composition, processing, implant geometry, surface treatment, porosity, and loading conditions.
| Department or Procedure | Common Material or Design Direction | Primary Selection Rationale |
|---|---|---|
| Trauma fixation | Titanium alloy or 316L stainless steel plates, screws, and nails | Fatigue strength, corrosion resistance, manufacturability, and controlled rigidity |
| Total joint replacement | Cobalt-chromium or titanium components with polymer or ceramic bearing surfaces | Wear resistance, load transfer, and long-term bearing performance |
| Spinal fusion | PEEK cages with radiographic markers and titanium or cobalt-chromium fixation | Radiolucency, load sharing, imaging visibility, and construct stability |
| Revision arthroplasty | Porous metal augments, cones, sleeves, and modular revision systems | Defect management, biological fixation, and intraoperative flexibility |
Procurement teams should verify traceability, material certificates, and supplier quality records. Ask for lot numbers, sterilization data, and clear instructions for use. Orthopedic teams should compare implant geometry, fixation method, imaging visibility, and revision options. A perfect fit on paper can still fail in real anatomy. Quality departments should check ISO 13485 certification and risk controls aligned with ISO 14971. Review nonconformity trends, complaint handling, and post-market surveillance evidence. Do not rely on a certificate alone.
Safety teams should examine biocompatibility evidence under ISO 10993 and validated packaging integrity. Infection-control staff need sterile-barrier data, shelf-life testing, and handling instructions. Finance departments should calculate the full cost, including instrumentation, training, revisions, and inventory waste. Regulatory specialists must confirm the device’s current authorization in the intended market. FDA 510(k), PMA, or other national pathways are not interchangeable. Requirements differ.
Use measurable evidence.
The World Health Organization reports that about one in ten patients experiences harm in healthcare, with more than half considered preventable (WHO, Global Patient Safety Action Plan 2021–2030). This makes documentation and surgical-team communication essential. The OECD’s Health at a Glance 2023 also shows substantial variation in hip and knee replacement outcomes between health systems. Such comparisons are useful, but they do not prove one implant is superior. Audit local outcomes, review registry data, and ask whether follow-up is long enough. Sometimes, the weakest evidence is hidden in a confident sales presentation.
7 Tips to Choose Orthopedic Implants by Department
Comparing Supplier Support, Costs, and Inventory Availability
Tip 1: Match the implant to each department’s case mix, surgical technique, and patient volume. A trauma unit may need varied sizes, while a joint replacement team may require predictable systems. Tip 2: Review supplier support beyond product delivery. Ask about surgical training, technical representatives, instrument availability, and response times during urgent cases. Support should be documented, not promised casually.
Tip 3: Compare total cost, not only the invoice price. Include instruments, sterilization needs, storage space, staff training, replacements, and possible wastage. A cheaper implant can become expensive when components arrive separately. Tip 4: Request clear pricing terms and review them with finance and clinical staff. Hidden assumptions create avoidable pressure. Costs change.
Tip 5: Check inventory availability using recent demand data. Ask suppliers about local stock, replenishment schedules, back-order procedures, and minimum order quantities. Tip 6: Confirm lot tracking, expiry controls, packaging integrity, and documentation before storage. These details support safer handling and reliable audits. Tip 7: Test the supplier with a limited evaluation period. Measure delivery accuracy, communication, implant fit, and operating-room workflow. Not every initial impression is correct. A supplier may offer excellent prices but weak follow-up. Conversely, strong support may justify a higher cost, although teams should challenge that assumption with measurable results.
| Tip | Department | Primary Implant Categories | Supplier Support to Compare | Indicative Implant Cost Range (USD) | Recommended Availability Target | Typical Replenishment Expectation | Key Purchasing Check |
|---|---|---|---|---|---|---|---|
| 1 | Trauma & Fracture Care | Plates, screws, intramedullary nails, external-fixation components | 24/7 technical assistance, emergency case coverage, instrument-tray support, and surgeon training | Approximately $150–$6,000 per implant or construct, depending on system complexity | High: 95%+ availability for core sizes | Same day to 48 hours for standard products; emergency access should be contractually defined | Confirm complete system compatibility, tray completeness, sterilization workflow, and after-hours delivery procedures |
| 2 | Joint Reconstruction | Hip and knee replacement components, liners, stems, augmentations, trial components | On-site case support, templating assistance, sizing guidance, revision planning, and surgeon education | Approximately $2,000–$10,000 per primary or revision implant system | High: 98%+ availability for commonly used sizes and bearings | Routine items within 24–72 hours; uncommon revision components may require several days | Compare total procedure cost, not only unit price; include trials, instruments, loaners, and revision-component access |
| 3 | Spine Surgery | Pedicle screws, rods, cages, plates, interbody devices, biologic adjuncts | In-room clinical specialist, imaging or navigation compatibility support, product training, and complex-case planning | Approximately $500–$7,500 per implant; biologic products may add substantially to case cost | High for standard screw and cage sizes; 90%+ for core inventory | 24–72 hours for standard components; specialty sizes and biologics may take longer | Evaluate MRI labeling, imaging compatibility, navigation integration, implant traceability, and biologic handling requirements |
| 4 | Sports Medicine | Suture anchors, interference screws, fixation buttons, meniscal-repair devices | Procedure-specific education, preference-card support, quick case coverage, and simple instrument setup | Approximately $250–$2,500 per implant or fixation device | High: 95%+ availability for frequently used anchor and screw sizes | Usually 24–48 hours for standard products; urgent replenishment should be available locally | Compare pullout strength, insertion consistency, packaging efficiency, and the number of instruments required |
| 5 | Hand, Wrist & Foot/Ankle | Mini- and micro-plates, small screws, staples, suture anchors, fusion implants | Detailed sizing support, broad small-fragment inventory, surgeon education, and reliable tray logistics | Approximately $100–$3,000 per implant or fixation construct | Medium to high: 90%+ for core sizes and 85%+ for less common configurations | 24–72 hours for routine products; specialty sizes may require advance scheduling | Check screw-head compatibility, plate contour options, left/right configurations, and low-profile design requirements |
| 6 | Pediatric Orthopedics | Small-fragment fixation, guided-growth plates, flexible nails, specialized correction systems | Pediatric sizing expertise, case planning, custom configuration support, and rapid access to uncommon sizes | Approximately $200–$5,000 per implant or construct | Medium: 85%+ for standard sizes; maintain access to uncommon pediatric configurations | 48 hours to several weeks for specialized or custom components | Verify growth-plate considerations, size range, imaging visibility, sterilization instructions, and regulatory indications |
| 7 | Operating Room Supply Chain & Value Analysis | All orthopedic implant categories, instrument trays, loaner sets, and consignment inventory | Electronic ordering, accurate inventory reporting, recall communication, usage data, vendor-managed inventory, and staff training | Measure by case-level total cost; common hospital planning ranges are approximately $1,000–$15,000+ per orthopedic case for implant spend | Target 95%+ fill rate for scheduled cases and documented emergency coverage | Set reorder points by usage history, service-line mix, lead time, and emergency-case frequency | Compare contract price, freight, expired-stock responsibility, consignment terms, tray fees, recalls, and product-return policy |
Planning note: Cost figures are broad U.S. hospital purchasing benchmarks for comparison purposes only. Actual prices vary by procedure, implant design, contract terms, clinical indication, insurance arrangement, and region. Confirm current quotations, regulatory status, availability, and total episode-of-care costs before purchasing.
An orthopedic implant checklist should begin with the department’s clinical workload. The trauma unit needs fracture patterns, emergency availability, and rapid sizing. Arthroplasty teams need fixation options, alignment tools, and revision compatibility. Sports departments may prioritize smaller implants and precise soft-tissue handling. Spine services require imaging control, neurological risk review, and instrument familiarity.
Build seven checks into one working sheet: indication, anatomy, implant material, fixation method, size range, instrument readiness, and outcome tracking. Record sterilization status and backup components before opening the tray. A missing screw or trial component can delay surgery. The American Academy of Orthopaedic Surgeons reports over one million hip and knee replacements annually in the United States, showing why consistent selection processes matter. Still, procedure volume alone should not decide inventory.
Use published outcomes, registry findings, and local complication data when reviewing each department’s choices. The World Health Organization estimates that one in ten patients experiences harm in healthcare, although not every event comes from implant selection.
This distinction matters. A checklist should separate surgical technique, device performance, and system failures.
Add fields for surgeon training, patient bone quality, imaging findings, and total procedure cost. Review the form quarterly with surgeons, nurses, infection-control staff, and procurement teams. It will not be perfect. That is the point. A checkbox may confirm availability, but it cannot replace clinical judgment, honest incident review, or careful patient discussion.
Request material certificates, lot numbers, sterilization records, usage instructions, and supplier quality records. Traceability matters. Do not rely on one certificate alone.
Compare geometry, fixation method, imaging visibility, size range, and revision compatibility. The best design on paper may not fit real anatomy. Patient anatomy can be unpredictable.
Review biocompatibility evidence, sterile-barrier testing, packaging integrity, shelf-life data, and handling instructions. Inspect every package. A damaged seal changes the decision.
Confirm current authorization in the intended market. Regulatory pathways differ between countries and device categories. One approval does not automatically transfer elsewhere.
Include instruments, sterilization, training, storage, replacements, revisions, and unused inventory. The invoice is only one part. Costs change.
Check training, technical assistance, instrument availability, urgent response times, and delivery accuracy. Ask for documented service levels. Promises are not evidence.
Track demand, local stock, replenishment schedules, expiry dates, lot numbers, and backup components. Check trays before surgery. A missing screw can delay the procedure.
Include indication, anatomy, material, fixation, size range, instrument readiness, sterilization status, and outcome tracking. Add bone quality, imaging findings, training, and total procedure cost. A checklist cannot replace judgment.
Review it quarterly with surgeons, nurses, infection-control staff, procurement teams, and quality specialists. Compare registry data, local complications, complaints, and follow-up results. Some weaknesses stay hidden.
No. Published results support comparison, but they do not prove universal superiority. Review local outcomes and follow-up duration. Confident presentations can contain weak evidence.
How to choose orthopedic implants for different medical departments begins with understanding each department’s clinical needs, patient population, surgical procedures, and expected outcomes. Trauma, joint replacement, spine, sports medicine, and pediatric departments may require different implant shapes, fixation methods, sizes, materials, and levels of flexibility. Surgical teams should match implant design and material to the procedure while considering anatomical compatibility, durability, imaging requirements, ease of use, and potential patient sensitivities.
A reliable selection process should also evaluate product quality, sterilization, traceability, clinical documentation, and compliance with applicable regulatory standards. Departments should compare supplier training, technical support, delivery reliability, pricing, and inventory availability rather than focusing only on initial cost. Finally, a department-based checklist can help staff consistently review clinical suitability, safety evidence, surgeon preferences, stock levels, and total ownership costs. Regular review of outcomes and inventory performance can further improve implant selection and support efficient, patient-centered orthopedic care.

Nipa Orthopedic Implants